Hostas are delicious. Not in a weird, convince-yourself-it’s-good way (*cough* dandelion), they’re actually SO good, and I’m told that eating them is quite popular in some parts of Asia.
Unlike cake, you can also eat your hostas and have them, too! A few harvests of the shoots of well-established hostas will not maim or even alter the appearance of the plant in bloom.
The taste is mild and fresh – like a soft asparagus, or a swiss chard with absolutely no bitterness. They can be eaten fresh (in salads), or my preference is to quickly toss them in a fry pan and finish with a splash of white wine (see my recipe here).
The ideal time to harvest is when the shoots are pointing straight up, before the leaves start to unfurl. This is when they are their most tender, if you wait longer they will be more fibrous. For me this happens just before my last frost date.
Make sure that you know the plant you are targeting is a hosta! All types of hostas are edible, but there are a few nasty plants that can resemble hosta shoots as they emerge. Lily-of-the-valley can look like slender hosta leaves, and they start to poke out in the garden at the same time. Lily-of-the-valley is decidedly NOT edible.
Use clean clippers. I like to use my small garden shears, the ones with the curved blade. Scissors might work, but they are likely to crush and bruise the spears and I’d avoid them if possible. A sharp knife is a good option as well.
Cut the hosta shoots at least one inch above the ground (two if the plant isn’t as well established). This is so that the leftover hosta shoot can access light and photosynthesize, keeping the plant nice and healthy despite your harvesting.
If the plant is small and not well established, harvest no more than half the shoots.
It’s April 1, and consistent with the day’s moniker I have planted my first seeds in the ground.
Around here I can expect my first frost-free 24hrs around the beginning of May, but it’s not unusual to have weather anomalies. Days may be below freezing, or they may creep into the high Celcius teens. Local wisdom is often quoted as saying not to plant out until after May 21, although experience has taught me that’s a little too conservative if I’d actually like a harvest before frost hits on the other end of the season.
A few days ago, in a frenzy of clearing last year’s weeds, I planted some climbing peas in the ground. I’ve done this before and gotten no time or yield gain whatsoever from my impatience, but it still scratched an itch to do it. Whenever I know I’m wish-planting I have a back up plan, and in this case I reserved most of my seeds to fill in the gaps or sow-anew.
This morning I put out three kinds of radishes, my yellow beets, and a bok choi seedling. I’ll sow the radishes every two weeks until early June, some more beets in 3 week intervals, and some more bok choi and other brassicas over the coming days. I like to space my early transplants out so if a squirrel or slugs find them and think they’re a tasty treat, hopefully they only get 1-2.
The seeds that I started inside about 10 days ago are doing as predicted. The tomatoes and peppers are slowly sprouting, the melons and squash are already looking like they’d prefer to be in the garden, but they somehow need to wait 6 weeks. Good thing that family transplants so well (they don’t!). There’s something comforting about making the same mistake every year, even knowing that I’m making it as it happens. Plants love to grow… for most of them, it will turn out fine despite me.
I’m back from an awesome and ambitious family vacation (thank you maternity leave and line-of-credit), and now it’s time to start my tomatoes and peppers. Usually I start these in February, yet here we are in the second half of March!
Several years ago I learned the difference between several varieties of maple trees. Disappointingly, and more to whit, I learned that the kind of maple trees I had on my property were Norway maples, not sugar maples. Dave and Stuart McLean of The Vinyl Café had already taught me that it takes a LOT of tree sap to make even a small amount of syrup, and with the wrong type of tree the romance of boiling our own syrup seemed unattainable.
Ok, better late than never, let’s see if I can jump on the winter sowing train in the latter half of winter, eight weeks before my last frost date.
I store my carrots in sand over the winter (this is relevant, I promise). I have two containers of them, and the other day I cleared the last carrots out of the first one, leaving me with a big clear tupperware containing a few inches of leftover sand. It occurred to me that I could use that container, with the sand, for winter sowing – and in fact the sand might be helpful.
The point of winter sowing is to set up mini greenhouses outside that will allow plants to germinate a little sooner than they would in the bare elements. This lets gardeners get a head start on the growing season without taking up indoor growing space and without the need to ‘harden off’ the plants before setting them outdoors (they’re already outdoors, they don’t need to harden up to being used to being outdoors). Any mostly clear plastic or glass will do to create the greenhouse, and recycled salad boxes, milk jugs and tupperwares are common.
Now, a greenhouse will warm up during the day from solar heat being trapped within the clear walls, but generally when the sun goes away the temperature within a greenhouse quickly returns to the surrounding temperature – unless it is insulated or unless it has a ‘heat sink’ inside it. A heat sink is anything that will absorb heat during the day, and slowly release it over night. Water or rocks are both examples of heat sinks. And so is sand.
So, when I removed the last of the carrots from my clear tupperware container of sand, my mind started wondering if I was now looking at a mini greenhouse pre-equipped with a heat sink, perfect for a slightly elevated winter sowing system.
A scientist would compare the tupperwares with and without the sand, but I’m not feeling like doing a head-to-head trial this year. We’re at ‘proof of concept’ only. I gathered 10 small potting containers (old solo cups, plant cells and a yogurt container – all with drainage holes) and filled them with well moistened potting mix. I tucked each container into the sand, so the bottom several inches have the sand wrapped around them like a blanket. I generously sprinkled seeds on the surface of each container of soil (one type of seeds per container), labelled them, watered them in, then put the lid on the tupperware and placed it outside in the snow.
If all goes well, as Spring arrives I should start to see little shoots – and on warm days I’ll vent the lid so the plants don’t cook, and hopefully I’ll have some starts to put in the ground eight weeks from now.
Meanwhile, my first seedlings are doing fairly well but I won’t be starting anything else until after March break. We’re going away, and while my husband has set up an impressive computerized watering system for my indoor plants, it doesn’t quite have the sophistication to handle neonatal tomatoes. With a seedling heat mat I’m pretty sure I can make up for lost time – and hopefully the winter sowing will also take some of the pressure off for the indoor starts! Fewer to start, more room to work with on the growing racks.
In other garden updates, we had a little false Spring blip this month when all the snow melted and the ground wasn’t even frozen – my chives started growing and my peach tree tree optimistically started budding. We’re back to freezing temperatures again, and while the chives will recover I’m worried that my peach may suffer some lasting damage. Evidence in my own yard of how climate change is going to, and already is, threatening food supply…
Most people start indoor seeds in small pods or sow many seeds in one small pot, and in many cases this will only keep the roots happy for a short time. They will need a bigger intermediary container before they are ready to go outside. Some common choices for this intermediate container includes specially purchased pots from a nursery, old yogurt pots, red solo cups, or my favourite, newspaper pots.
Newspaper pots are awesome because in most cases they are free, they provide excellent drainage and air flow for plant root development, and the pots themselves are biodegradable in a city or home compost system.
Many places will see gadgets to make newspaper pots, but you don’t need them at all! Any cylinder the same diameter as the newspaper pot you want to create will do, plus long strips of newspaper that will wrap around that cylinder at least twice and are about as tall as half the diameter of the cylinder plus your target pot height. The best type of cylinder frame, in my opinion, is a wine bottle with a recessed bottom.
Making the pot doesn’t require any tape or glue, it will stay based on the way you roll and fold the paper, and when you fill the pot with a little soil that will also help the structure.
To start, lay your strip of matte newspaper down flat (doesn’t matter if it’s coloured or black and white). Place the wine bottle, or whatever you’re using, along one edge with some overhang of the paper (which you fill fold in to become the bottom). Roll the paper around the bottle, fold in the bottom, and ease the pot away. It’s actually difficult to explain without the visual, so please click on the video above to see it in action!
Usually I am itching to start my seeds in December and start planting things in early January, but this year I held off (partly due to some travel, partly due to improving self-restraint). But today was the day!
There are so many reasons to garden, it’s such a wholesome endeavor. It often reduces our carbon footprints, helps the ecosystem, improves our mental and physical health, and saves us money. I’ve been interested in gardening pretty well since I could walk. I especially loved my grandmother’s garden. When she was preparing supper she would give me a bowl and some snips and ask me to go harvest yellow beans, and I remember thinking yellow beans from her garden were my favourite vegetable.
Far from it! It was not very long ago at ALL that I was clueless about even the most basic gardening concepts. One year, my aunt told me that tomatoes will have a bigger root system and grow better if you bury the stem when you transplant… so I buried the whole stem, ALL of it, and was surprised when they didn’t pop out of the soil a few weeks later like blades of grass!
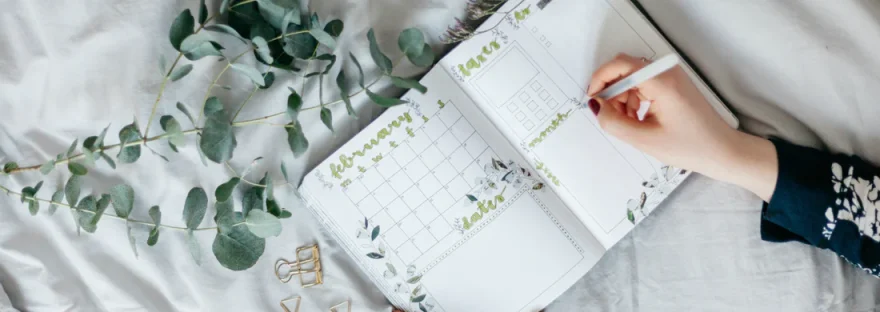
Gardening is a learning process, and the learning is never done. One of the best ways to make the lessons stick, and to build your knowledge, is by writing down what happens every year in the garden. What did you plant, when, where, how did it do?